How to Obtain an HTTPS Certificate for Your Website

How to Obtain an HTTPS Certificate for Your Website
17% of surveyed businesses will improve their website security. Follow these 5 steps to protect all your data transfers with an HTTPS certificate for your website.
The secure transfer of customer data is critical to a business’s success. With security threats on the rise, a recent survey finds that 17% of small businesses plan to increase their web security. The ideal place to begin is to secure your user data with HTTPS.
HTTPS – hypertext transfer protocol secure – is a secure version of the automatic HTTP data submission protocol found in your URL.
HTTPS is the only way to ensure that all data sent to and from your server is automatically encrypted.

Using HTTPS means that:
- Visitors can verify you as the registered owner of the domain
- Customer information is encrypted and cannot be intercepted (credit card numbers, passwords, etc.)
- Customers are more likely to trust and complete purchases on your site because of the HTTPS security
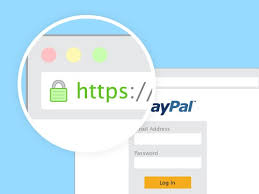
How can you tell which websites and pages are secure? Instead of http:// in the URL, look for https://.
Google Chrome and Firefox also display when HTTPS is in effect by using the lock icon, seen here.
Also known as SSL (secure socket layers), this secure transfer process prevents hackers from accessing information and protects sensitive user data.
Even if the network connection is breached, the intruder still needs to decrypt the data that’s passing between the browser and the website.
Fortunately, setting up an HTTPS (aka SSL) certificate is easy. Follow these 5 steps to encrypt your data transfers and move toward internet security:
- Switch to a dedicated IP address
- Acquire an HTTPS certificate
- Active the HTTPS certificate
- Install the HTTPS certificate
- Update your site to use HTTPS

1. Switch to a Dedicated IP Address
A dedicated IP address is an internet address assigned exclusively to your business’s hosting account.
By comparison, the shared hosting accounts provided by web hosting plans, such as through GoDaddy, make you share the server’s IP address. When multiple websites use the same location, you can’t be sure that the server traffic is secure or your own.
You can ask your web host to upgrade your account to a dedicated IP address. This will incur a small fee, but a business-level IP address is the first step to securing user data on your site.
2. Acquire an HTTPS Certificate
The HTTPS certificate (also called an SSL certificate) is like an ID card for your website. It proves to the server that your website is your website.
An HTTPS certificate is actually a paragraph of numbers and letters unique to your domain. When someone visits your site via HTTPS, the certificate is checked.
If there’s a match, all data flowing to and from your website is encrypted afterward.
You can acquire an HTTPS certificate one of three ways:
- Paid HTTPS Certificates: You can pay a commercial Certificate Authority (CA) or your hosting company to acquire an HTTPS certificate. For a small fee, you’ll get the added benefit of technical support during installation.
- Cloud-Based HTTPS Certificates: Cloud providers such as Content Delivery Networks (CDNs) and Website Application Firewalls (WAFs) can also give you the benefits of a certificate. Services like Securi act as a proxy for your website, pointing your domain records to their servers and filtering out any malicious traffic.
- Free HTTPS Certificates: You can generate a certificate for your website on your own. Open certificate authorities such as Let’s Encrypt allow you to create and install your own HTTPS certificate following their instructions.
Looking to Generate a Free HTTPS Certificate?
You will need the following information about your server:
- IP address
- Server username (with administrative privileges)
- User password (or SSH key authentication)
- Software type
- Operating system
You can contact your web host for any missing information.
Once you have the required information, connect to your server and install a tool that will generate an HTTPS/SSL certificate for you.
This tool will allow your computer to send SSH commands. These are encrypted protocols used to access a secure server from an insecure location.
This allows you to make changes to the server and access your HTTPS certificate without risk.
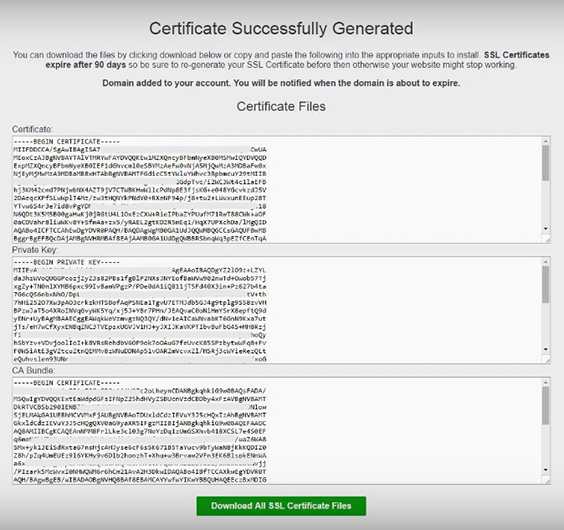
Here’s an example of your certificate:
Mac users can use a built-in application called Terminal for SSH. Windows users can download an application called PuTTY or Certbot.
With your app installed, you can connect to your server over SSH using your IP address, username, and password.
Then, follow the instructions in the app to generate your certificate and automate certificate renewal (so you don’t have to repeat this process).
3. Activate the HTTPS Certificate
Your web host should handle this step for you. It will take between 1-2 days for the certificate to become active.
If you want to active the certificate yourself, you’ll need to generate a CSR, or Certificate Signing Request.
This is a block of encoded text to give to a Certificate Authority when applying for an HTTPS Certificate. It contains the key codes for the public and private access to your website.
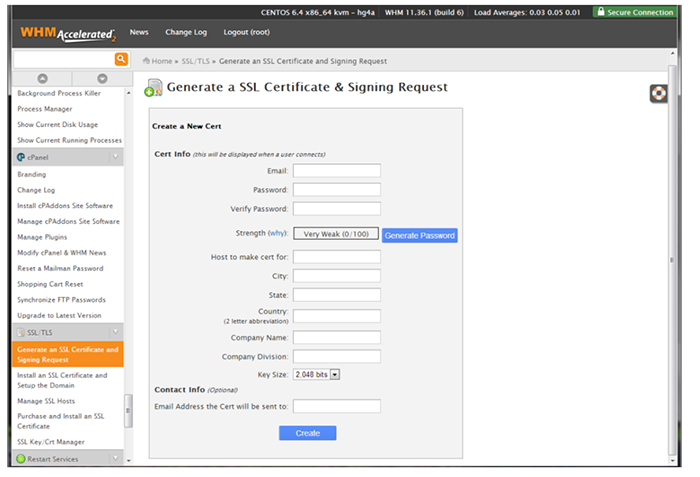
To create the certificate, go to your web hosting control panel.
In the SSL/TLS admin area, you will see a tab for ‘Generate SSL Certificate and Signing Request.’ It will look something like this:
After you’ve filled out this form, you’ll see a screen with your CSR text:
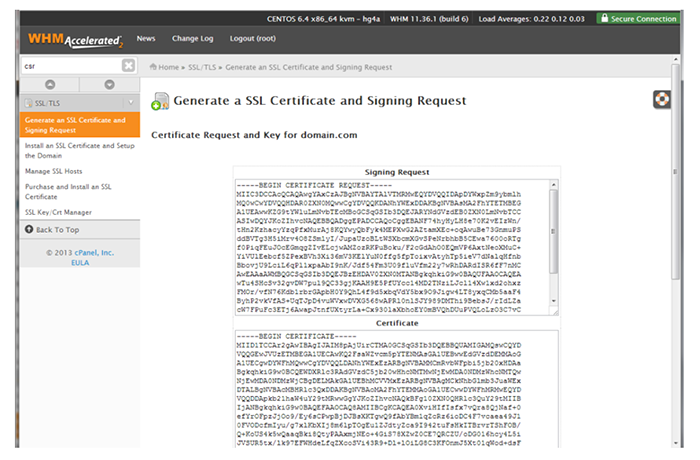
Copy the “Signing Request” block of text. This is the CSR that you’ll give to the CA to validate your website identity and activate the HTTPS/SSL certificate you’ve generated.
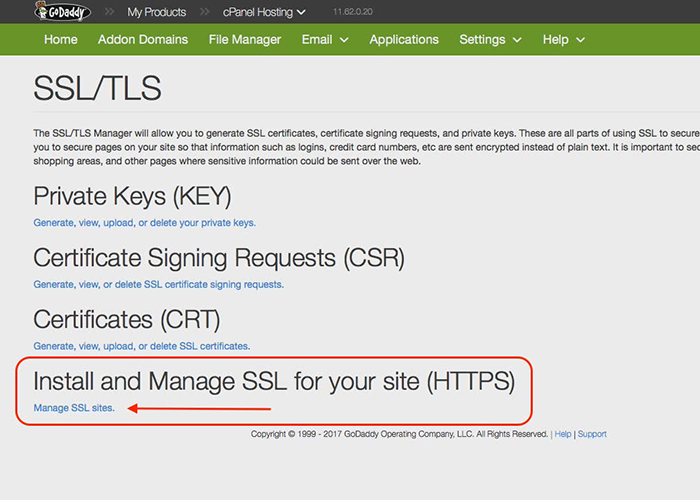
4. Install the HTTPS Certificate
Your web host may also complete this step for you. This can also take 1-2 days before completion.
To install the HTTPS certificate yourself, go to your web host control panel. Then find the tab for “Install an SSL Certificate” in the SSL/TLS menu, as seen here:
With your certificate copied, paste it into the first box in the installation prompt and click “Submit.” Now try to access your site from https://yoursitename.com and you should find that your connection is secure.
5. Update Your Site to Use HTTPS
If you go to https://yoursitename.com and it loads, you’ve successfully installed SSL and enabled the HTTPS protocol.
However, you still need to ensure visitors are accessing your site via HTTPS to protect their data.
Typically, you’ll only want to update pages that handle sensitive user information to HTTPS. Otherwise, you’re just slowing your site speed from added encryption processing.
Identify these pages, then perform one of the two following actions:
- Update all links to the target pages to use HTTPS links. For example, if there’s a link to the cart on your home page, update the link to an HTTPS-secured link. Do this for all links on all pages that point to URLs that will transmit sensitive material.
- Redirect users who won’t need HTTPS protection through your server. This will ensure that people can use the specific pages securely, regardless of the links they arrive from. To perform this update, go to your server and insert this PHP code:
// Require https
if ($_SERVER['HTTPS'] != "on") {
$url = "https://". $_SERVER['SERVER_NAME'] . $_SERVER['REQUEST_URI'];
header("Location: $url");
exit;
}
- Use a mod-rewrite in the apache configuration in your server. This will ensure that anyone arriving at a page via HTTP is switched to HTTPS. Here’s the code snippet for the mod-rewrite:
RewriteEngine On
RewriteCond %{HTTPS} off
RewriteRule ^(cart/|checkout/) https://%{HTTP_HOST}%{REQUEST_URI}
Your Website is Now HTTPS Secure
A properly installed website certificate is what guarantees the secure transfer of website and user data. The lock icon in the URL bar is a trusted symbol that shows users that their data is protected.
Remember that HTTPS doesn’t mean all your server information is secure. It only protects the transfer of data between a visitor’s computer and yours.
Encrypting your database is the surefire to keep all static information safe.

Ian Heinig
Writer, Clutch
Ian Heinig is a copywriter who loves big ideas, brand strategy, and psychology. Most days he's drafting new ways to share value, but he's also an illustrator, yogi, and freelance burrito analyst. Find him at radicalartsdepartment.com.